
A Number of Methods of Image Masking into Photoshop

There are a number of methods of image masking service into Photoshop. Let’s explain to you several. Simple Image Masking!
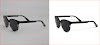
Open photos into Photoshop you desire to utilize for your image masking tutorial purpose (go to file menu and click open, from the dialogue box and select the photo which you would like to apply.
1. Quick Selection Tool: Quickly select areas of an image and save selection as a mask, allowing for fast and simple image masking.
2. Pen Tool: Draw paths to define a selection for masking highly detailed sections of an image.
3. Refine Edge Tool: Make precise adjustments to the edges of a selection and mask complex shapes and objects.
4. Layer Masks: Create a separate layer for an image mask, allowing adjustments to the mask and image without affecting the original image.
5. Masking with color channels: Take advantage of the variation in color and brightness within an image to create masks.
6. Luminance masks: Use complex selection techniques to create luminance masks that mask darker or brighter areas effectively.
7. Clipping Masks: Place one layer above another and clip them together, revealing only the top layer in the areas where it is selected.
8. Clone stamp tool: Use the clone stamp tool for more precise control than the regular brush tool when masking.
9. Brush Tool: Select a brush size and shape to mask areas of an image, using various settings for opacity, hardness, and more.
10. Vector Masks: Create paths for shapes or selections with the pen tool and save them as masks.
Read More


0 Comments